
How to Clean Stainless Steel Pans (Inside & Under)
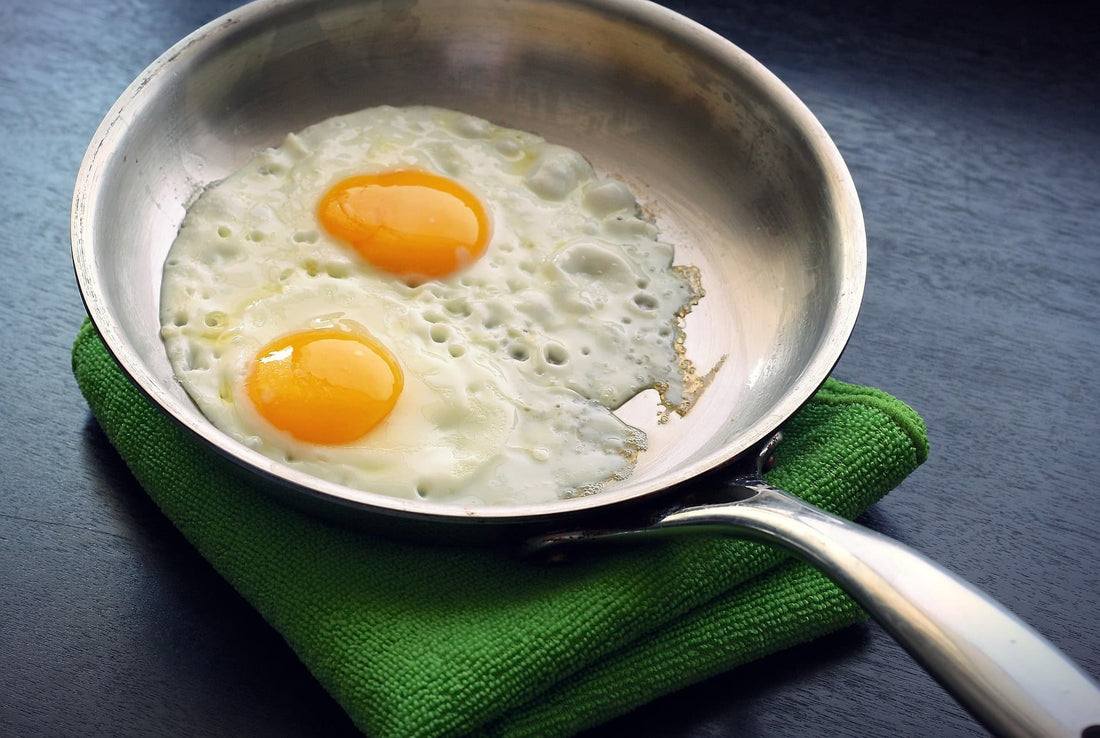
Stainless steel can feel like you've been lied to as soon as it stains. You're kinda thinking, "wait, I paid a premium for this?" If this is your experience with stainless pans, I'm with you. When I first started, I had no idea what I was doing. Eggs stuck like crazy and cleaning was a new learning curve.
What kept me hooked though was its toughness, and the fact I could oven bake it. That was the game-changer. So I stuck with them. Turns out, these pans are crazy good as long as you have the right products and habits. Let's dive in...

Here are the holy grail products
I've started using this a lot lately instead of the yellow and green scrubs. It's just right for the job and leaves my pan unscathed (Thanks to Shark Tank and good word-of-mouth!).
- Plastic scrapers
You can use the same ones from my oven glass cleaning guide. They're non-scratch and you can get them at Supercheap Auto.
Another product inspired by the public. Everyone and their Nan is talking about this. I had to give it a go myself. And yeah, certainly lived up to the hype. Works great for scrubbing the underside. Pro tip: Always wear gloves when using BKF! It's powerful but tough on hands.

- White vinegar
I swear I'm writing this ingredient on every blog, but I guess that's just how multipurpose it is. It's what you need to stop the rainbows after cleaning the pan. That's heat staining by the way from when the pan gets too hot.
- Microfibre towel
Like I covered in my stainless sink blog, there's a plethora of stainless steel types. The same goes for stainless pans, so you won't go wrong with softness.
Saving the best for last (just kidding, unless...?). I write these blogs to help people, and I'm upfront with the use cases of my own stuff. Like in my kettle blog - I won’t suggest my cleaner unless it’s actually useful. For stainless pans, it’s better for regular scrubbing than cleaning underneath.

Here are the best habits to start practising:
Start washing your pan after 10 minutes off the heat
It feels generic to say this, but don't leave your pan in the sink for too long. There is a caveat to know though with stainless pans, and that's letting it cool before you start washing. And I know that's contradictory to what I just said, but quick temperature drops aren't good for these pans. They can warp from thermal shock, which means stress from sudden temperature changes. All you have to do is cool the pan down, watch a couple of shorts, and then come back. From here, you'll want your Scrub Daddy and a spritz of cleaner. Scrub the burnt-on oils, then rinse and dry with microfibre. Dryness is key if you want shine without the water marks.

Only putting in oils and animal fats after the pan is heated
And I know this is more a prevention tip, but like the Chinese saying goes, "hot wok, cold oil, food won't stick." It's overgeneralized, but very relevant to stainless steel pans. I didn't understand this when I first started with them, and it made cleaning a nightmare. The trick is to use medium heat until you're able to sprinkle a touch of water and see pearls dancing around in the pan. Kind of like the Pinball game we all played on the computer as a kid.
Plastic-scrape the residue that scrubbing doesn't fix
Browning comes from dried and crusted oils, and so frying them up adds insult to injury. Plastic scrapers are great for cleaning stubborn grease with no risk of scratching. They're perfect for making sure your pan's spotless before it sees the stove again. It's also good to look at washing tips the pan manufacturer provides.

How to get rid of discolouration or the "rainbow hue" we're all familiar with:
This rainbow sheen, also known as heat tint, happens when the cooking temperature is too high. I'm glad I found out it's reversible, as old me would've half given up on the pan already. It's super easy. 2 cups of water. 2 cups of white vinegar. Heat it up on the stove for about 15 minutes on medium or high. And we're moving quickly here. Apply the "10 minute no-heat" rule we just learnt, and then rinse and wipe. And voilà! Your pan should now be good as new. One thing I will suggest is opening your windows, since you’re heating vinegar. This is also an effective way to remove limescale if any builds up.

Why I don't season my stainless pans for longevity (it's time for a bit of science)
The thing with stainless pans is that their surfaces are extremely smooth. And they come with a layer of chromium oxide, which is what gives them corrosion resistance. Think of chromium as a bodyguard in stainless steel that's always on duty. The moment air touches the pan, the chromium forms a super-thin shield. You can’t see it, but that's what makes the pan rust-resistant. This explains why normal seasoning doesn't work well on stainless steel. It's this chromium oxide layer that makes it hard for oil to stick.

A useful tip when moving food around in the pan
Although stainless pans are considered durable, soft-tipped utensils still win out. Here's why. It's not just about the surface being more forgiving, it's about reducing stress on it when you can. So what I like to do is stick to silicone spatulas. These not only withstand heat, but also make scratching way less frequent over the years you own the pan.
Why food might not be cooking evenly
It might come as a surprise, but not cleaning the bottom has its drawbacks. I'm just thinking about glass and induction stoves, which I wrote about here. These are flat surfaces that you're putting your pan on. So it makes sense that having a grease layer barricade the pan isn't ideal for heat distribution. Not only that, the more you burn the layer in, the harder it is to clean later. What I'm getting at is - all this goes beyond a hygiene issue. Efficiency and function are also things to consider.

Finally, the dreaded part: scrubbing the bottom
If the bottom looks mentally defeating, it's understandable. I'm no saint when it comes to putting things off until it's out of control. But as the product name 'Bar Keepers Friend' suggests, you do have a helping hand in all of this. Just be sure to wear rubber gloves first, since BKF is acidic and can irritate skin. Use this cleanser as you would with baking soda. That means applying it liberally to the bottom of the pan, and then making a wet paste. I always like checking in every minute or so to see how well it's doing - then I start scrubbing. I'm like most people in that I'm not as worried about the underside since you're not cooking there. That said, if the bottom concerns you, it's perfectly valid to follow the label's soaking time. If you let BKF work its magic, it reduces effort and returns 2-fold results. No more meat-headed elbow grease!

FAQ
What if my routine clean isn't enough?
Aside from plastic scraping, there's another trick when residue won't budge. Instead of adding vinegar like we did with heat tint, add cleaner instead. Dish soap works, but I like my own cleaning products just for comfort. Stainless might be smooth, but it’s still got microscopic texture. That means tiny traces of cleaner can get caught in the grain, even after rinsing. It’s not a big health issue, rather just something I’m pedantic about. If cleaner and water don't work, try heating baking soda as a last resort.

Do scratches matter at the end of the day?
From an aesthetic point of view, sure, but performance-wise, not really. And this is that durability I was talking about earlier. With a Teflon pan, scratches like this make it toxic. With stainless, it doesn't. That's another benefit I like about them. On a related note, if you own a glass or induction cooktop, charred pan-bottoms can scratch. Just another reason why you should clean under your pan.
Do you suggest using oven cleaner? Because that works, right?
Yes, it certainly does. And you could argue that the bottom doesn't matter, but here's the thing. It dulls the finish. For me, I look at a stainless pan as a kitchen staple. I want it on display. I want it seen by guests the moment they walk in. It helps to prevent damage where you can, and use products suited for their purpose. That's my take anyway.

Should I trust the marketing claims that say "dishwasher-safe?"
Don't get me wrong, dishwashers are great for light stains. But baked-on grease won't come off with the ease you're likely after. While hand scrubbing is tedious, the extra punch you get is well worth it.
What are some secrets when it comes to long-term care?
Many don't know, but cold meats have a higher chance of sticking to the pan. So I like first sitting them on a plate for up to 15 minutes at room temperature. The other tip is if your dish involves water, like pasta for instance, only add salt once the water's boiling. And not to make this a science lecture, but it ties back to chromium oxide. In short, salt disrupts the protective layer if it sinks to the bottom, which causes pitting. I'm just trying to push your pan care to the next level.

Takeaways for today
I know that was a lot of chemistry, and I don't mean to scare anyone away. But stainless pans are special. I just don't want people paying a bunch of money and going through hell like I did. They're great cookware pieces and nothing beats slippery eggs sliding around and about. I'll leave you a special technique though before you go. For those who don't care about how the underside looks, tip the pan over after cooking, and run it under cold water. This speeds up the cool-down, and is useful if you cook consecutive dishes with one pan. Just thought I'd drop that little nugget in at the end. Good luck!
Related articles
How to Clean Non Stick Frying Pans (100% Scratch-Free)
How to Clean a Cast Iron Frying Pan and Season It Afterwards
